Advanced Campaigns Settings
Learn more about the advanced campaigns settings
Navigate to the bottom left corner of the dashboard to access the advanced settings. Here you can access and modify the Schedule (Campaign Scheduler), Lead Filter, Time Zone Strategy, Call Status Strategy, and State Dialing Strategy.
- arrow Schedule
- Lead Filter Strategy Lead Filter
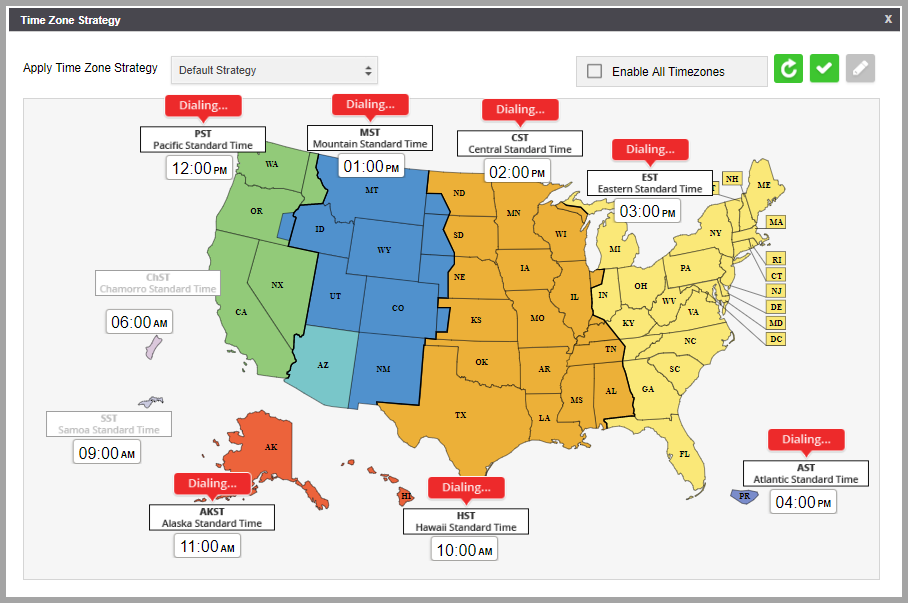
- arrow Time Zone Strategy
- arrow Call Status Strategy
- arrow State Dialing Strategy
SCHEDULE arrow
Click on the campaign scheduler icon to create a new schedule or view, edit, or delete an existing schedule. Once you open the Campaign Scheduler, double-click on the times slots screen to create a new schedule. When done, click on 'Save' to submit.
Create New Schedule

- Description
- Campaigns
Select a campaign where the scheduler will be applied.
- Lists
Click on the box and you will see the Lists attached to this Campaign. Select the Lists you want to activate
- Lines
For campaigns with voice dial mode, select the number of lines that will be activated with the campaign.
- Sending Rate
For SMS Broadcast, select the number of text messages that will be sent per minute.
- Repeat Event
Enable the repeat event option to set the campaign schedule to recur. Select the schedule accordingly.
- Time Period
Select the time and date when the schedule will start and end.
View and Modify Existing Schedule
Open the Campaign Scheduler and click on the existing schedule. The following options will appear:
Details
Click to view the details of the schedule/event. You will be redirected to the Modify Campaign Schedule screen where you can make necessary changes. When done, click Save.
Modify
Click to modify the description of the schedule/event.
Delete
Click to delete the schedule/event.