Agent Details
Agent Details tab provides you with the agent information, calls overview, and displays customer details.

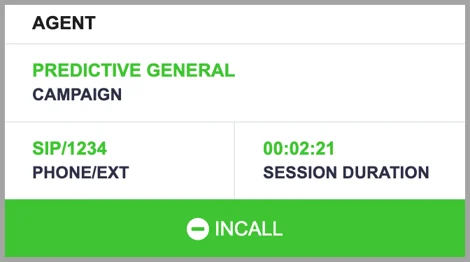
Agent
Review the campaign name, agent's phone number or extension, session duration, and agent status.
- Campaign: The campaign that an agent is logged into.
- Phone/Ext.: The agent's phone number or extension.
- Session Duration: The total or running time that the agent has been logged in to the agent interface.
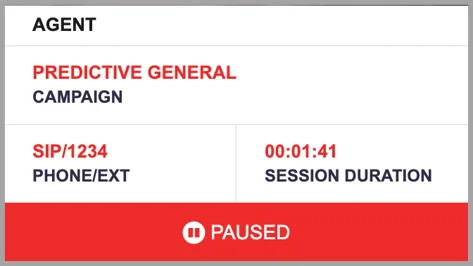
- Status: The agent's current status. The status can be one of the following:
- In Call: The call has been connected, and the connection is currently active.
- Ready: The agent is ready to receive calls.

- Paused: The agent is not ready to take any calls yet.
- Disposition: The agent dispositions the call.

Customer Status
Customer information will appear as soon as the agent connects to a live call.
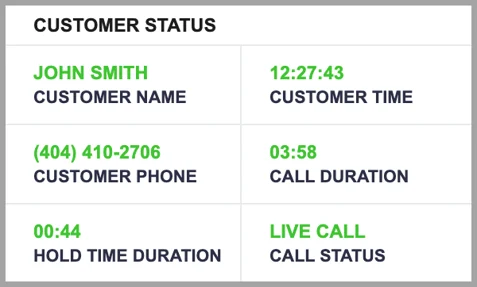
- Customer Time: The customer's local time.
- Customer Phone: The customer's phone number.
- Call Duration: Indicates how long the agent has been on a call with the customer.
- Hold Time Duration: Indicates how long the customer has been on hold.
- Status: The status of the call. If there is no active call, this field displays the status of the agent. The status can be any of the following:
- Ready: The agent is waiting to receive calls.
- Paused: The agent is not ready to take any calls yet.
- Live Call: The agent is currently engaged in a call.
- Disposition: The call is finished and the agent is choosing a disposition for the call.
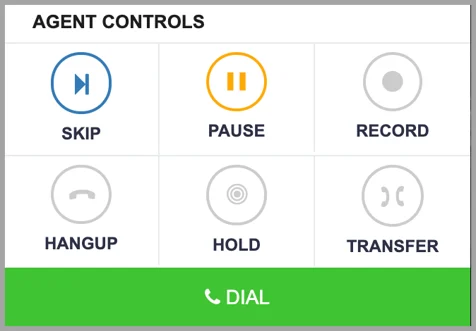
Agent Controls
The Agent Controls bar contains various controls that allow you to configure your services and perform call-related actions. The set of actions may differ based on the dial mode and agent status.
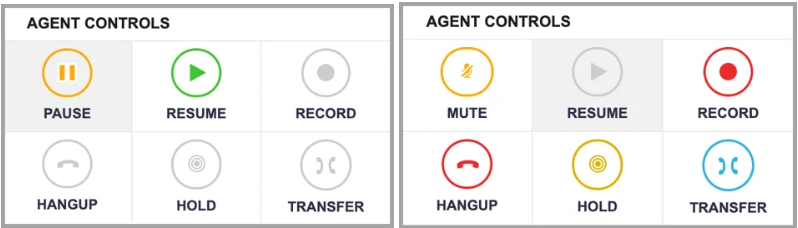
- Pause: Click on 'Pause' if you are not ready to take a call at the beginning of your shift or in-between calls. You can also go on 'Pause' while completing the documentation for the previous call.
- Resume: Click on ‘Resume’ to set yourself available for calls. This will activate your line and return your line to your Queue/s.
- Record: Click on ‘Record’ to record a call. Depending on the campaign settings, the call recording may always be ON or OFF.
- Hangup: Click on ‘Hangup’ to end the call.
- Hold: This option allows you to place the call on hold. See ‘Hold Time Duration’ under the Customer Status bar to check how long the customer has been on hold.
- Transfer: Click on 'Transfer' to transfer the call to a selected queue, agent, or destination.
- Mute: Click on 'Mute' to mute your microphone during the call.
Agent Controls for Preview Manual dial mode
The Agent Controls bar is different for Preview Manual campaigns. There are two additional actions available in Agent Controls. The 'Preview Lead' option allows you to preview lead details before placing calls. Click on 'Dial' to place a call to the selected contact.

Transfer Options
After selecting the transfer destination, choose from any of the three transfer methods:
- Transfer: Transfer the call to the destination directly. This option is available to all transfer destinations.
- Add Call: Initiate a conference call with a third party and the customer. This option is available to Preset and External transfers only.
- Hold & Add Call: This option places the customer on hold and initiates a call with a third party. The customer can be added back to the conference by clicking on the Hold button. This option is available to Preset and External transfers only.
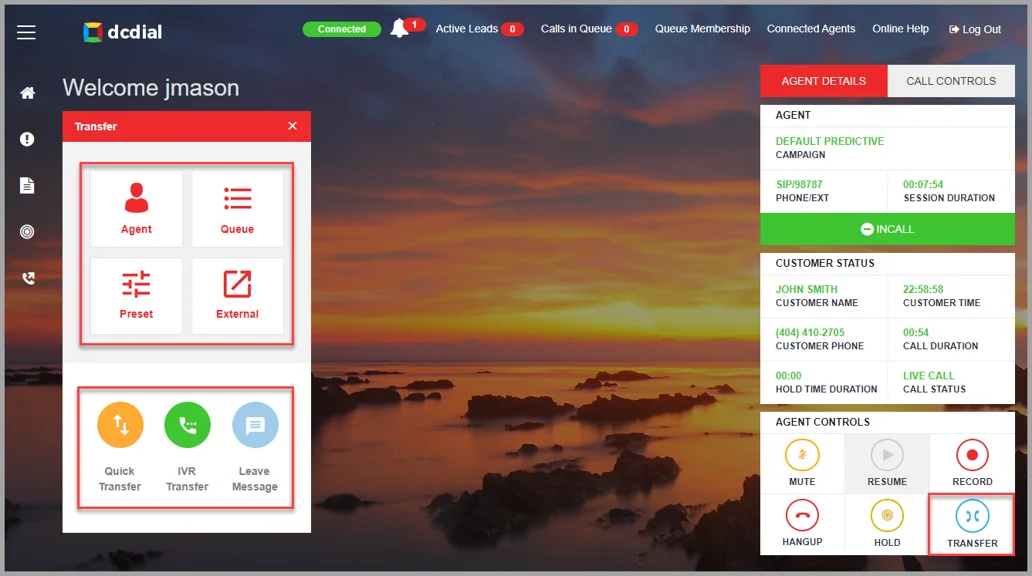
Transfer Destination
- Agent: Click on 'Agent' and select an agent from the list. If you do not see an agent on the list, that means that there are no ready agents available

- Queue: Click on 'Queue' and select a queue from the list. If the queue list is empty, that means there are no transfer queues enabled for this campaign.

- Preset: Click on 'Preset' and select a preset destination from the list. Presets are numbers that have been saved in the system the same way that you would save a phone number in a phone book. If you do not see any options on the list, that means that there are no presets configured for this campaign. With preset transfers, agents can use the conference call features to add a third party to the conversation.

- External: Click on 'External Transfer' and type in the phone number you would like to transfer the call. With external transfers, agents can use the conference call features to add a third party to the conversation.

- Quick Transfer: This option allows you to quickly transfer a call to a pre-configured destination.
- IVR Transfer: This option allows you to transfer calls to an IVR menu.
- Leave Message: This option allows you to leave a prerecorded message on an answering machine.