Microphone Browser Permissions
This guide will walk you through how to configure microphone access permissions.
We recommend using Google Chrome or Mozilla Firefox browsers to access the Agent Portal. To use the built-in webphone, you must provide DCDial microphone access.
Google Chrome
You can setup microphone permission in Chrome in one of two ways:
- By clicking on the three horizontally-stacked dots on the top-right-hand corner of Chrome;
OR
- By clicking on Ctrl+Shift+Del and clicking Esc when the 'Clear Browsing Data' window pops up.
Horizontal Dots
Step 1: Click on the three horizontally-stacked dots on the top-right-hand corner of Chrome.
Step 2: Choose ‘Settings’ from the menu.

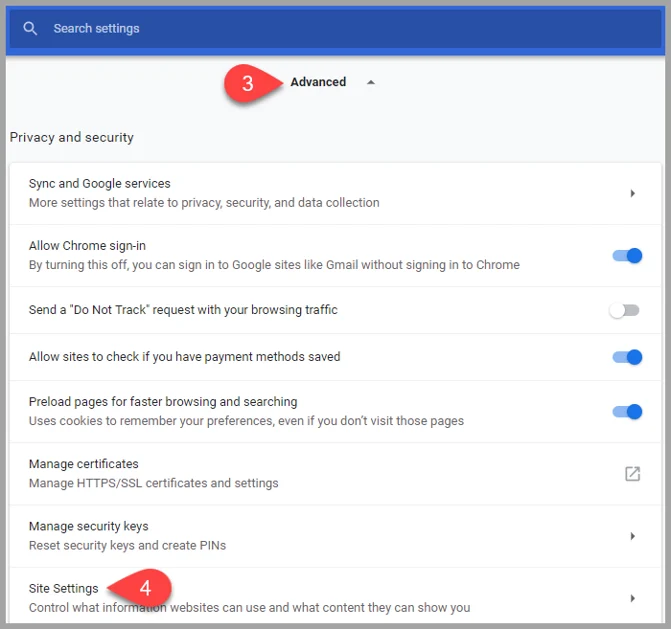
Step 3: Scroll all the way down to the bottom of the page and open the ‘Advanced’ link. This will open the 'Privacy and Security' section.
Step 4: Click on 'Site Settings'.
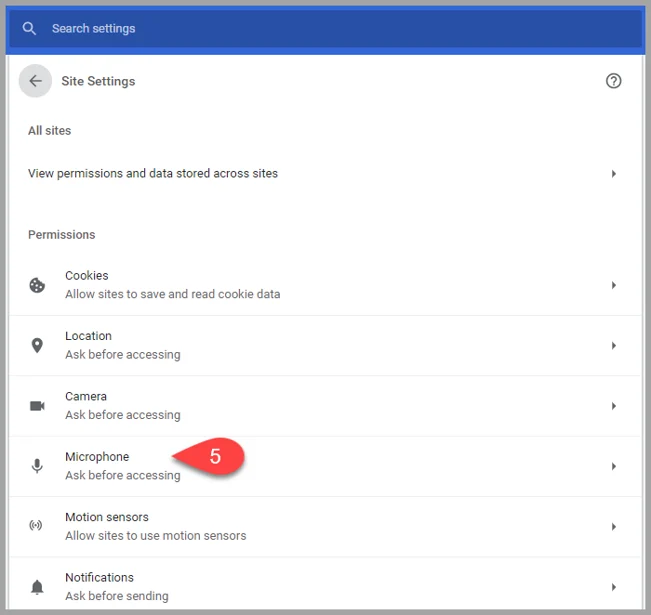
Step 5: Click on 'Microphone'.

Step 6: The list of approved and blocked websites can be seen in the settings section. The default microphone will be selected. Use the drop-down menu to change the microphone that you will be using. You can also delete websites from the microphone settings section. This will force Chrome to ask for permission the next time you visit the site.

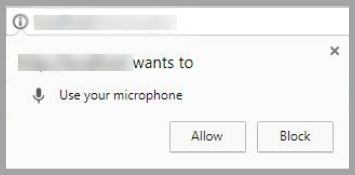
Step 7: If you don't see the agent portal website in the allowed list of sites for microphone access, go to the website. A pop-up box will open, asking to access the microphone.
- Click ‘Allow’ to automatically enable the microphone for a designated website.
- Click ‘Block’ to disable the microphone for a designated website.

Shortcut Keys
Step 1: Click on the Ctrl+Shift+Del keys. The 'Clear browsing data' window will pop up.
Step 2: Click on the Esc key.
Step 3: Scroll all the way down to the bottom of the page and open the ‘Advanced’ link. This will open the 'Privacy and Security' section.
Step 4: Click on 'Site Settings'.

Step 5: Click on 'Microphone'.
Step 6: You can see the list of approved and blocked websites in the settings section. The default microphone will be selected. Use the drop-down menu to change the microphone that you will be using. Users can also delete websites from the microphone settings section. This will force Chrome to ask for permission the next time the site is visited.

Step 7: If you do not see the agent portal website in the allowed list of sites for microphone access, go to the website. A pop-up box will open asking for access to the microphone.
- Click ‘Allow’ to automatically enable the microphone for a designated website.
- Click ‘Block’ to disable the microphone for a designated website.
Mozilla Firefox
You can setup microphone permission in Firefox in one of three ways:
- By accessing Page Info on the main Firefox screen;
- By accessing Options in the Firefox Menu; or
- By accessing the Gear Icon through the address bar.
Page Info
Step 1: Right-click anywhere on the page. Click on 'View Page Info' in the box that will appear.

Step 2: Once the 'Page Info' screen appears, click on 'Permissions'.
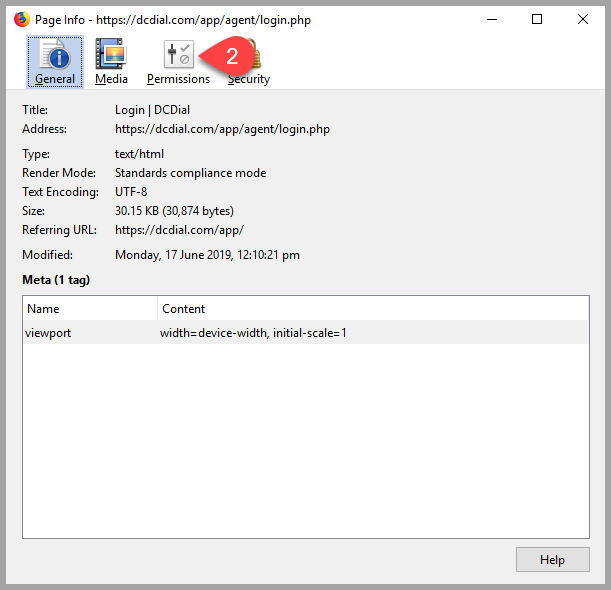
Step 3: The 'Permissions' screen will open. Scroll down to the very bottom of the page.
Step 4: Once you have reached the bottom of the page, you will see the option to 'Use the Microphone'. Uncheck the box for 'Use Default'.
Step 5: Depending on what permissions you want to set up, you can choose 'Always Ask', 'Allow', or 'Block'.

- Always Ask: You will be prompted to allow microphone permission every time you access a site asking to use your microphone.
- Allow: All microphone permission requests will be automatically allowed without prompt.
- Block: All microphone permission requests will be automatically blocked without prompt.
Page Info
Step 1: Click on the menu bar. The menu bar is the three horizontal lines on the top corner of the screen.
Step 2: Click on 'Options'.

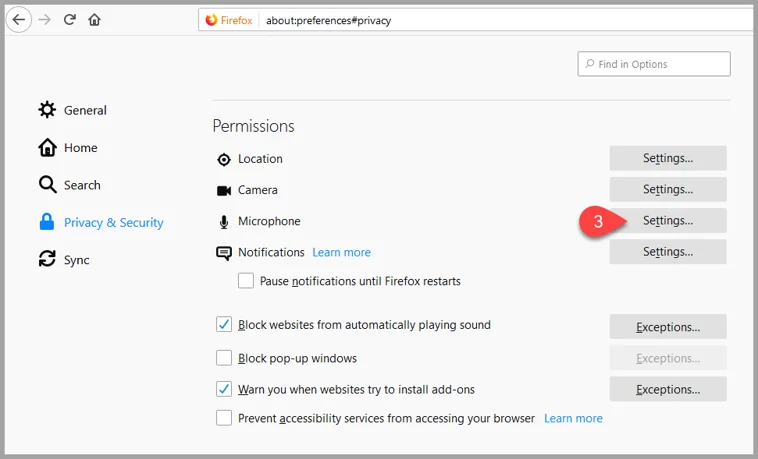
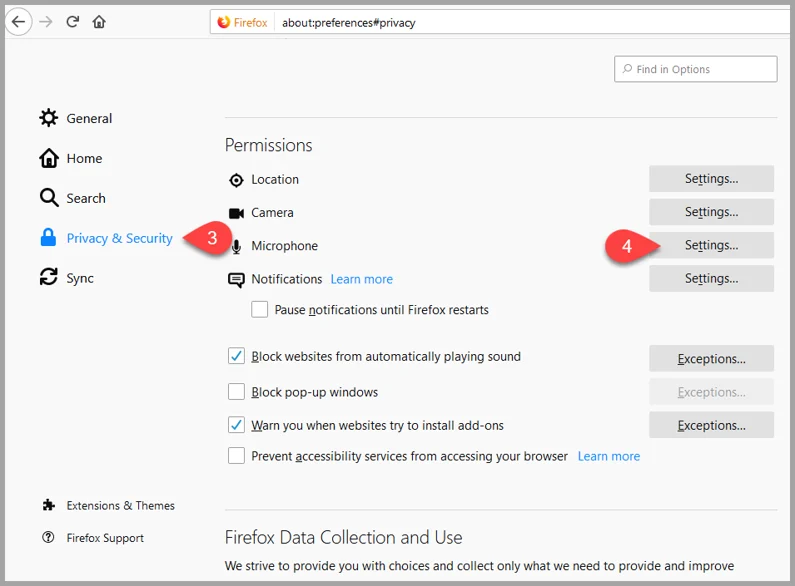
Step 3: Click on 'Privacy & Security' on the left-hand side.
Step 4: Scroll down until you see 'Permissions.' Click on 'Settings' next to Microphone.
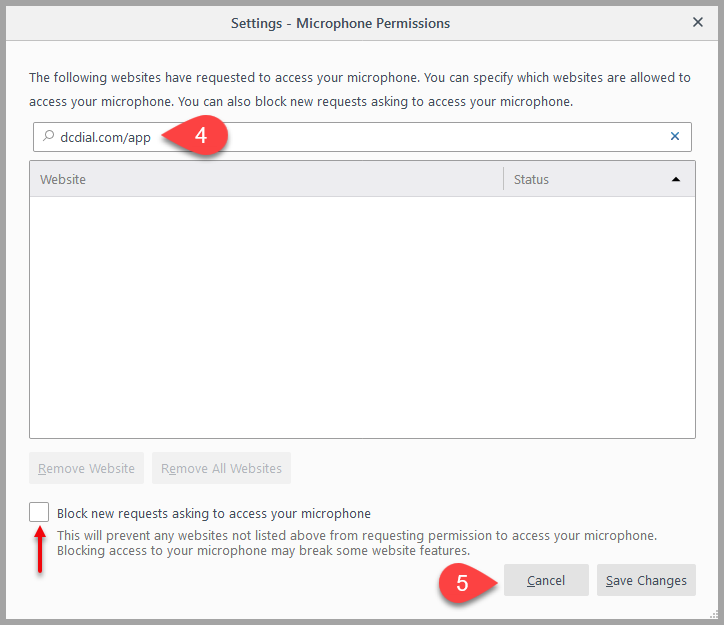
Step 5: On the bar, type in the URL for the website you want to grant microphone permission to.
Step 6: Click on 'Save Changes' at the bottom of the screen. You can add more websites as needed.
Please Note: To block new requests asking to access your microphone, put a check next to the box and click on 'Save Changes'.

Gear Icon
Step 1: Click on the warning icon found in the address bar.
Step 2: Click on the gear icon next to 'Permissions'. You will be redirected to the Permission screen.
Please Note: To block new requests asking to access your microphone, put a check next to the box and click on 'Save Changes'.

Step 3: Click on 'Settings' next to 'Microphone'.

Step 4: On the bar, type in the URL for the website you want to grant microphone permission to.
Step 5: Click on 'Save Changes' at the bottom of the screen. You can add more websites as needed.
Please Note: To block new requests asking to access your microphone, put a check next to the box and click on 'Save Changes'.