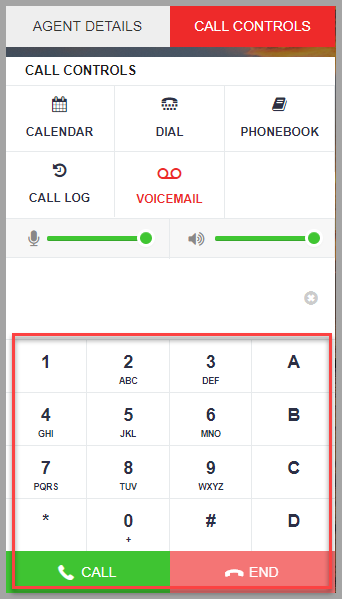
Call Controls
This section has a built-in webphone that you can use to place manual calls.
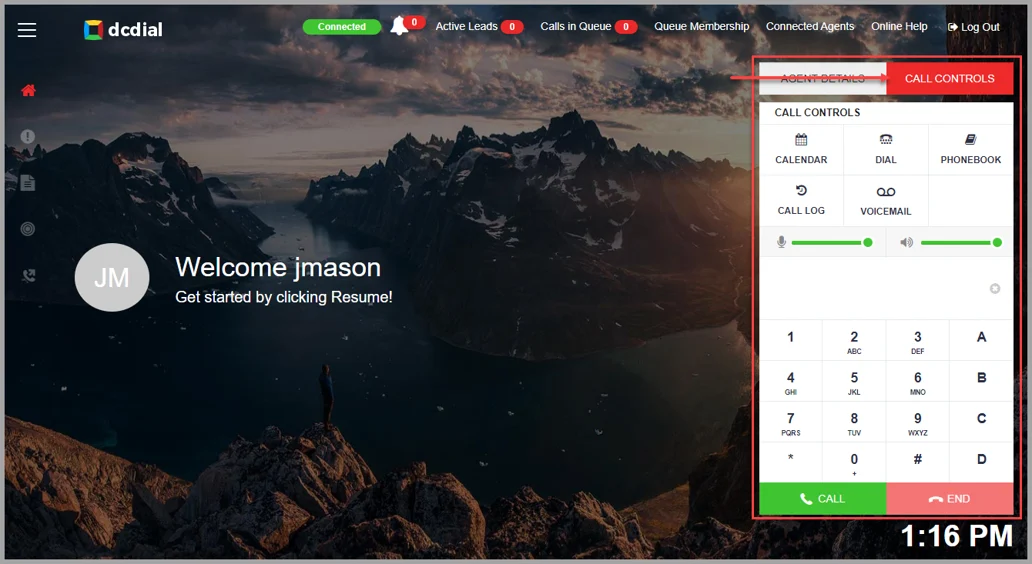
- Calendar: Click on to open the call back calendar. It contains information on scheduled callbacks.
- Dial: Click to open a new window and manually dial external numbers.
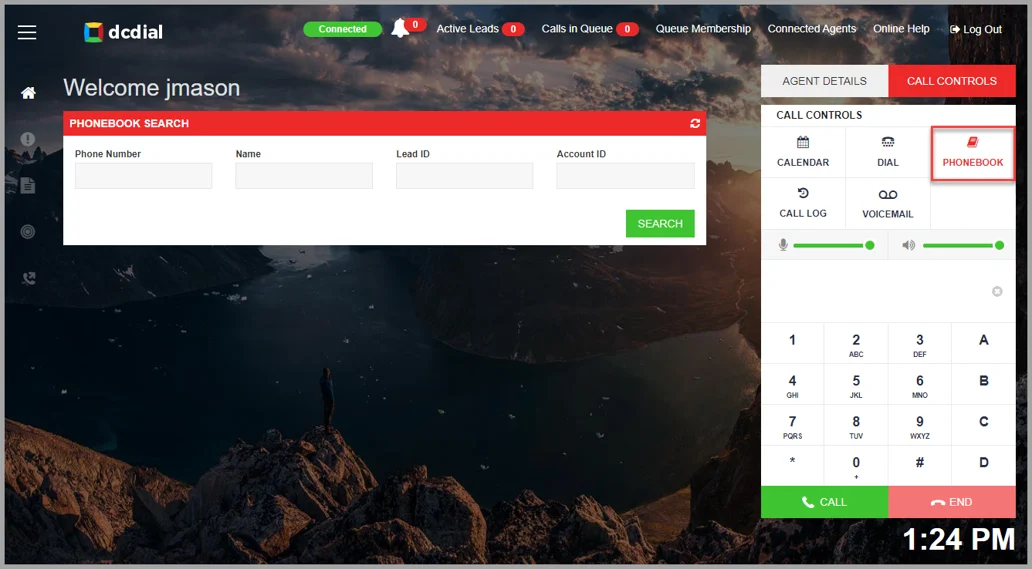
- Phonebook: Click to open up the phone book screen where you can search for saved contacts.
- Call Log: Click to view call history from the current day. You can view the lead details and redial a number from the list.
- Voicemail: Click to view the voicemail messages and listen to them as needed.
- Microphone Volume: Click to increase or decrease the microphone volume.
- Speaker Volume: Click to increase or decrease the speaker volume.
- Dial Pad: Click to use the number pad in order to dial external phone numbers or to enter DTMF tones while on a call.
Calendar
Click on calendar icon to open the call back calendar.
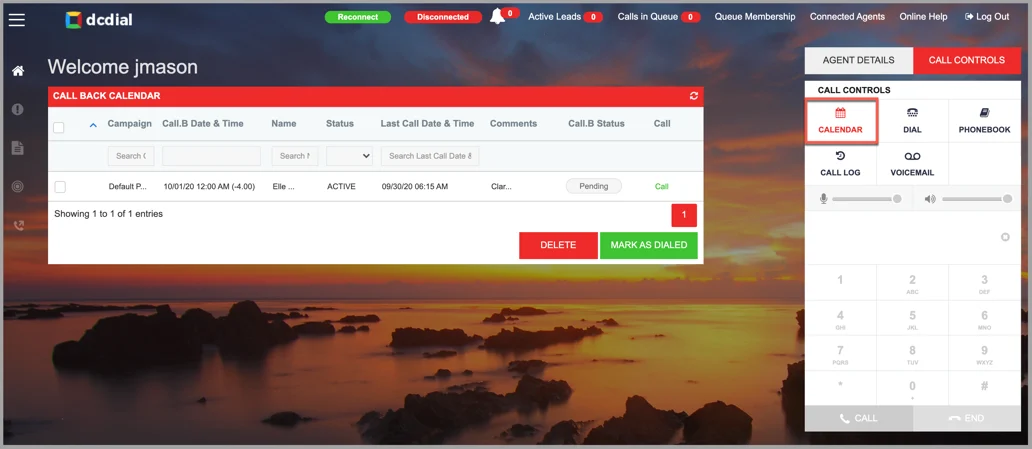
- Search: You can filter your results by campaign, call back date & time, contact name, call status, and last call date & time.
- Campaign: The campaign to which the lead with a scheduled callback belongs.
- Callback Date & Time: The scheduled callback date and time.
- Name: The name of the lead.
- Status: The current call status of the lead.
- Last Call Date & Time: The date and the time when the lead was contacted previously.
- Comments: Any notes or comments on the lead or the callback itself.
- Callback Status: The status of the callback. The options are 'Active', 'Pending', or 'Dialed'.
- Call: The option to call the lead will display if the call-back time condition was met.
- Delete: To delete a callback, select the lead by checking the box in the far left column and then click the 'Delete' button.
- Mark as Dialed: To manually mark a call back complete, select the lead by checking a box in the far left column and then click the 'Mark As Dialed' button.
Dial
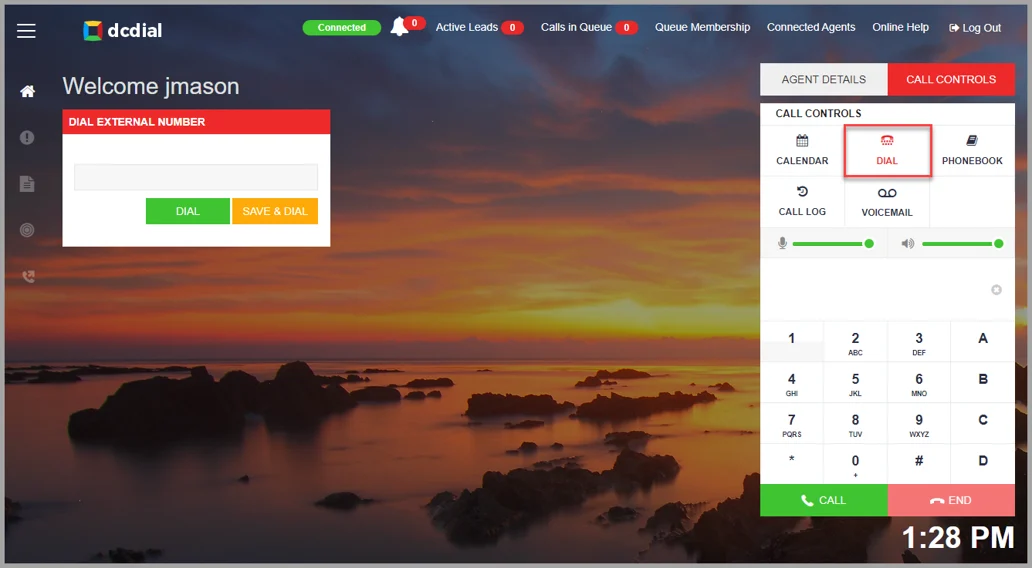
If manual dialing is enabled, for your campaign, you may call leads manually using this option. Click the 'Dial' button to open the 'Dial External Number' window. Enter the number you want to dial and click 'Dial' or 'Save & Dial.' Clicking on 'Save' and 'Dial' will dial the lead and automatically create a lead record in the system outbound calling list.
Phonebook
You can search for a lead in the campaign list by selecting 'Phonebook.' Enter your search criteria and click on 'Submit Search' to generate the search results. To perform another search, click on 'Reset Form.'
Call Log
Click on 'Call Log' to view the call records for the current day.

- Date/Time: The date and time when the call was made.
- Length: The call duration displayed in minutes and seconds.
- Status: The lead's call status.
- Phone: The phone number of the lead that was dialed.
- Campaign/Queue: The campaign or the queue to which the lead belongs.
- Hangup: Indicates whether an Agent or Customer terminated a call.
- Info: By clicking on the info link, you can open the lead details screen.
- Dial: By clicking on the dial link, you can call the lead.
Voicemail
Click on 'Voicemail' to access your voicemail messages. You can also modify your voicemail options through the 'Record Greeting' option.
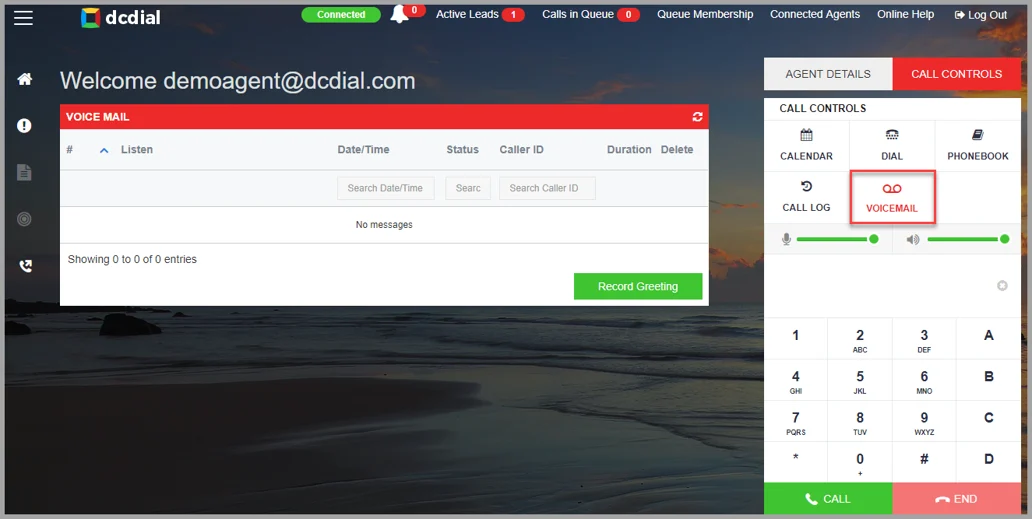
- Listen: Provides a play button to listen to the voicemail message.
- Date/Time: The date and the time when the message was left.
- Status: The status of the voice message. It can be either 'New' (has not been played yet) or 'Old' (has been played).
- Caller ID: The caller ID of the person who left the voicemail message.
- Duration: The voicemail length measured in minutes and seconds.
- Delete: Allows you to delete the message from your voicemail box.
Record Greeting

Once you click on 'record greeting', a new call will be initiated, and you will hear whether you have new messages or not. Afterward, you will hear voice prompts on the different voicemail options you have. Press the button on the dial pad corresponding to the option you want to access and follow the prompts accordingly.
- Press 2 to Change Folders
- Press 3 for Advance Options
- Press 0 for Mailbox Options
- Press * for Help
- Press # to Exit
After you press the exit prompt, you have to disposition the ca
Microphone & Speaker Volume
To manage your Microphone and Speaker volumes, slide the bar to the right or left.

Dial Pad
If manual dialing is enabled, for your campaign, you may call manually by entering the number using the dial pad and clicking on 'Call.' Click on 'End' to terminate the call.
