Internal Portal Settings
DCDial offers a secure internal portal that allows you to initiate and process your customers' payments, send a payment link, and create custom payment agreements.
Only authorized users can access the internal portal using their account in DCDial. Before processing customer payments through the internal payment portal, you need to adjust the internal portal settings based on your preferences.
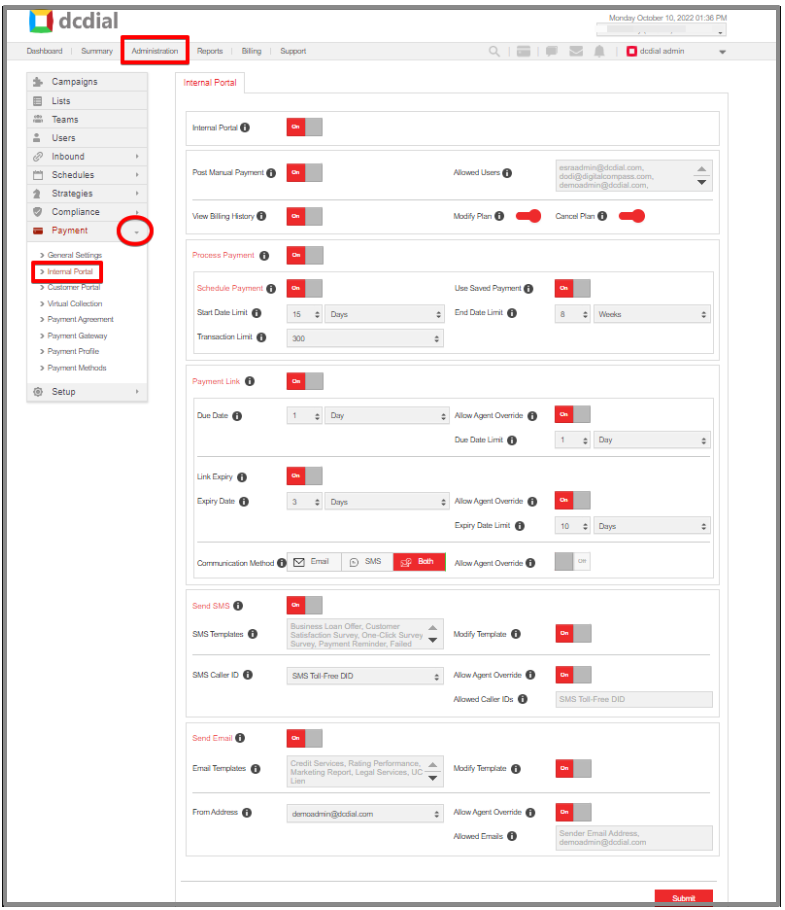
- Internal Portal
- Post-Manual Payment
- View Billing History
- Allowed Users
- Modify Plan
- Cancel Plan
Process Payment
Enable this option to allow users to process one-time payments or schedule recurring payments from the internal portal.
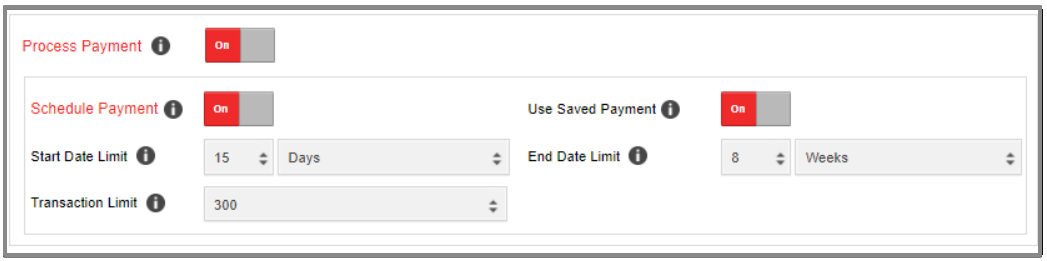
- Schedule Payment
- Start Date Limit
- End Date Limit
- Transaction Limit
- Use Saved Payment
Payment Link
To allow users to send payment links from the internal portal, switch the 'Payment Link' toggle to ON.
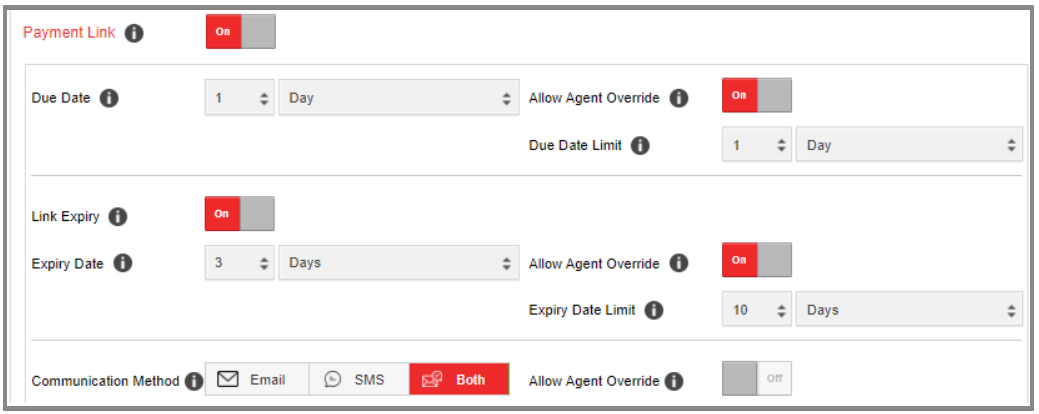
- Payment Method
Select the payment method that customers can use to make a payment using the external payment portal.
- Allow Agent Override: This option allows payment users to change the payment methods available to the customers.
- Due Date
Select the payment due date.
- Allow Agent Override: This option allows payment users to change the payment due date.
- Due Date Limit
- Link Expiry
Enable this feature if you would like a payment link to expire automatically once the time limit is reached.
- Expiry Date
Select the time limit customers have to make a payment using a payment link. The time limit counter starts when the link is sent to the customer.
- Allow Agent Override: This option allows payment users to change the expiry date.
- Expiry Date Limit
Limit how far in advance users can set a payment expiry date.
- Communication Method
- Allow Agent Override: This option allows users to change the available payment methods from the internal portal.
Send SMS
To allow users to send text messages from the internal portal, switch the 'Send SMS' toggle to ON.
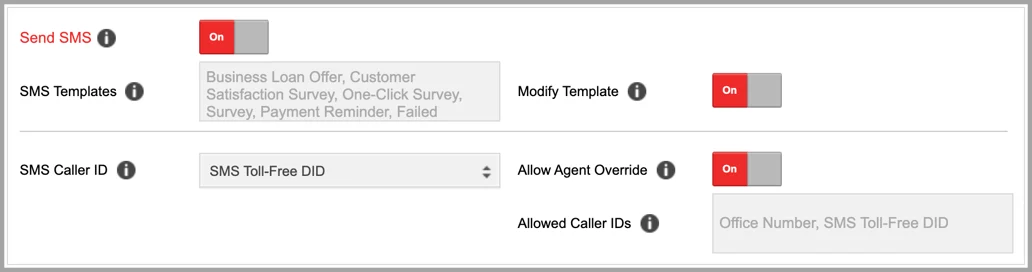
- SMS Templates
- Modify Template
- SMS Caller ID
Please note: Before selecting the phone number from the drop-down menu, select at least one number in the 'Allowed Called IDs' box.
- Allow Agent Override
Enable this option to allow the payment users to override the SMS settings.
- Allowed Caller IDs
Select one or more caller IDs the users can choose from when sending text messages from the internal portal.
Please note: Before selecting the caller ID(s) from the drop-down menu, you need to assign the caller ID role for the phone number from the Company Numbers page.
Send Email
To allow users to send one-to-one emails from the internal portal, switch the 'Send Email' toggle to ON.
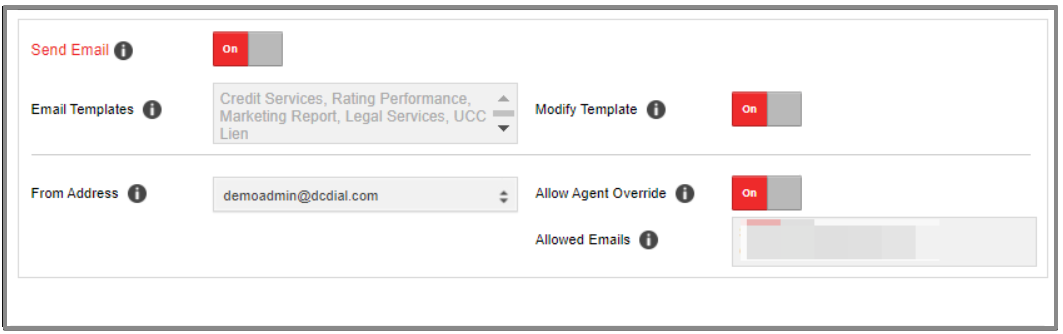
- Email Templates
- Modify Template
- From Address
Please note: You can send emails only from the verified email addresses. So, before selecting the email address from the drop-down menu, select at least one email in the 'Allowed Emails' box.
- Allow Agent Override
- Allowed Emails
Please note: Before selecting the email address(es) from the drop-down menu, connect your personal email from the User details page or corporate email from the Company Branding page.
Verify Email
You can send emails only from verified email addresses. Click on 'Verify', and the system will send you an email with the verification link.
Look for the verification email in your inbox and click 'Approve' in that email. A confirmation message will appear in your web browser. If you didn't get the email, check your spam folder.