Payment Profile
A payment profile can be used to utilize multiple payment gateway providers for each company by creating a separate payment profile and assigning it under Company Branding
PAYMENT PROFILE
You can utilize multiple payment gateway providers for each company by creating a separate payment profile and assigning it under the Company Branding.
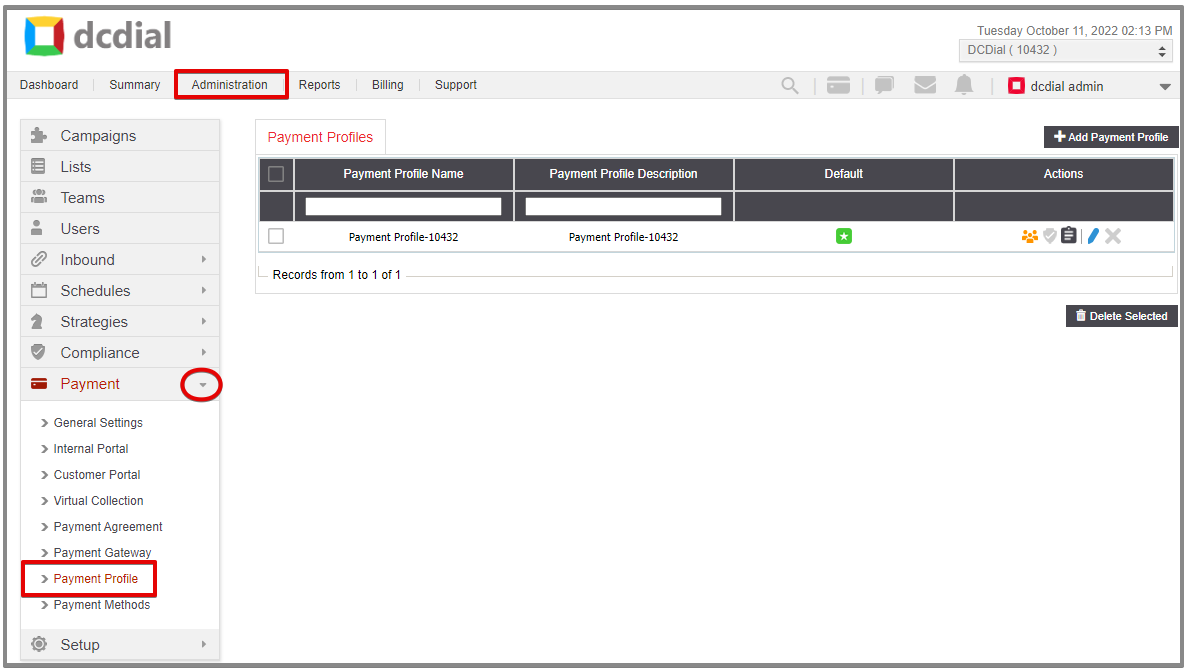
- Default
The payment profile set as your default option.
- Actions
- Associations: Hover over the icon to view the associated campaigns.
- Active: The payment profile is active. Click on the icon to deactivate the payment profile.
- Inactive: The payment profile is inactive. Click on the icon to activate the payment profile.
- View Activity Log: Click the icon to view a summary of events. Learn More About the Activity Log
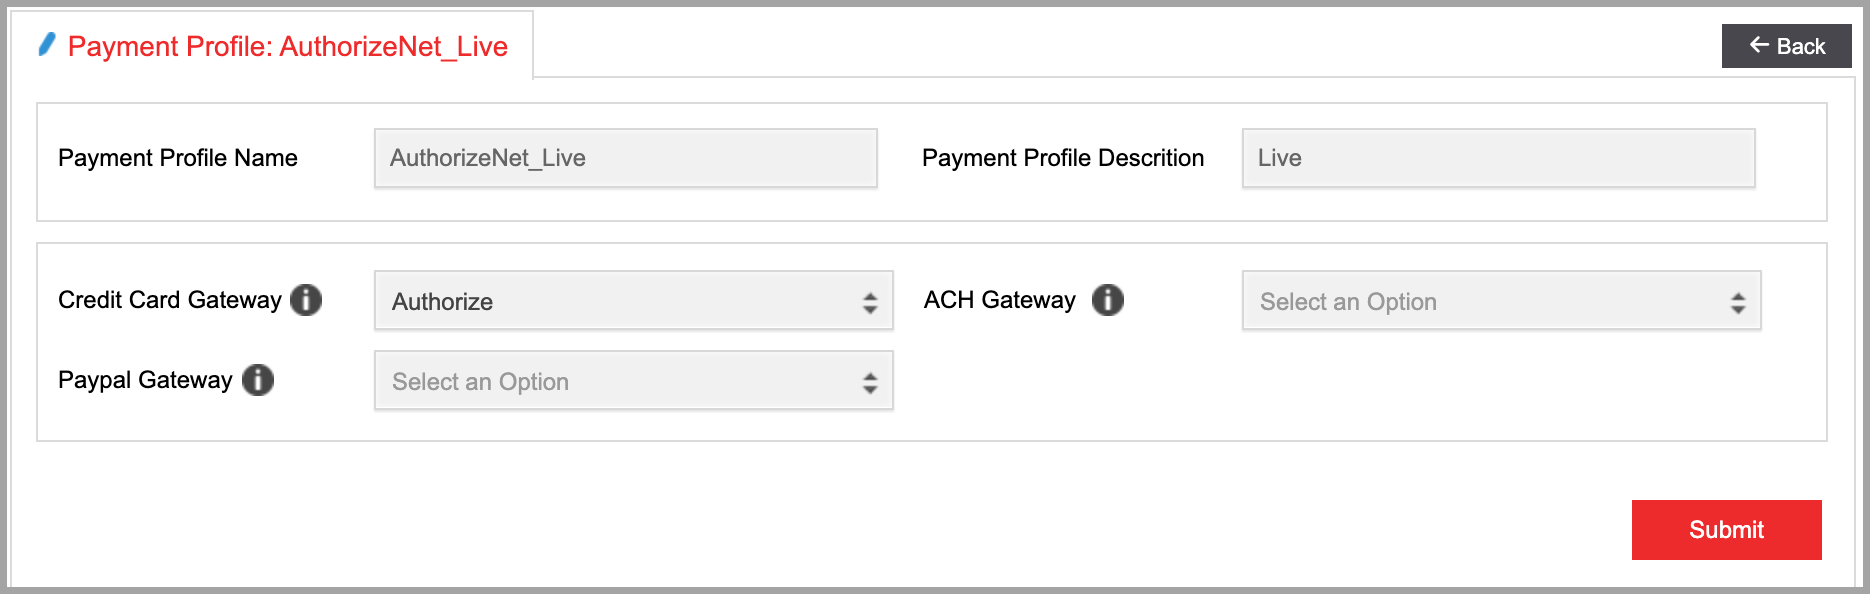
- Modify: Click the icon to modify the payment profile. Learn More About Modifying Payment Gateway
- Delete: Click the icon to delete a payment profile. A confirmation screen will appear to confirm the deletion.
ADD PROFILE
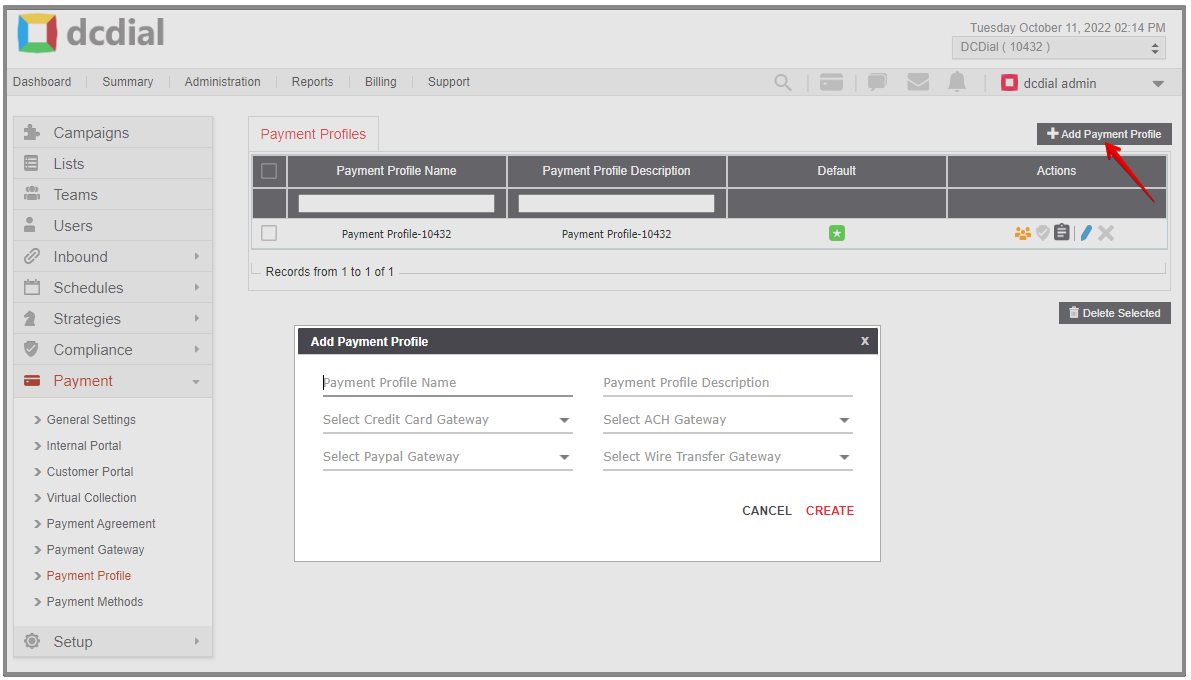
Step 1. Click on the 'Add Payment Profile' button on the top right to create a new payment profile. Complete the required fields in the pop-up window and click 'Create' to proceed. You will see a confirmation once the profile has been created successfully, and you will be redirected to the details page to complete the setup process.
Please note: Before creating a payment profile, you need to add the payment gateway(s) under the Payment Gateway tab.
Step 2. Configure the Payment Profile settings on the profile details page. Verify the information entered, and make changes as needed. When done, click on ‘Submit’ to save your changes.