Process Payment
With DCDial, you can process a single payment or schedule a series of payments for your customers.
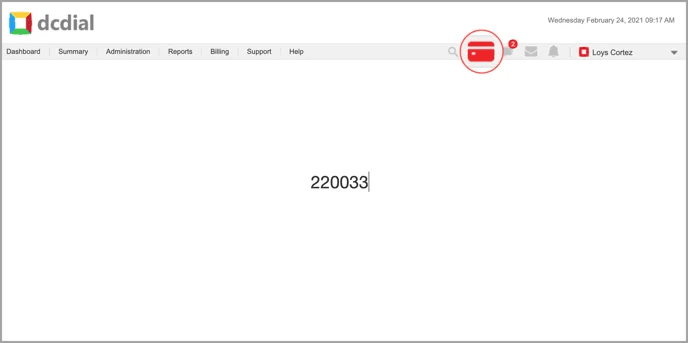
Step 1. Click on the 'Payment' icon to access the internal payment portal.
Search the customer's account by one of these filters (you can change the filter by clicking the button next to the search field):
- Account ID
- Phone Number
- Name
- Email Address
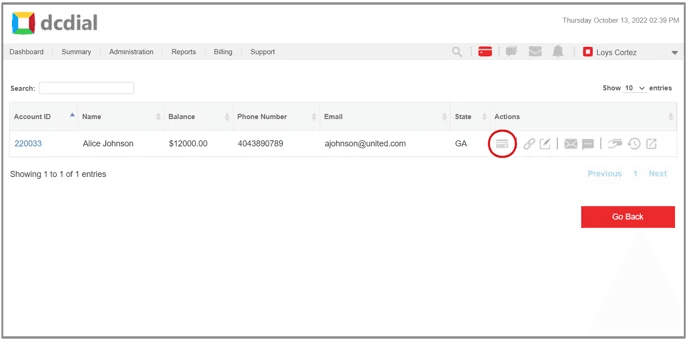
Once you have located the customer's account, you will be presented with the following options:
- Process Payment
- Send Payment Link
- Create Payment Agreement
- Send Email
- Send SMS
- Post Manual Payment
- View Payment History
- View All Payment Options
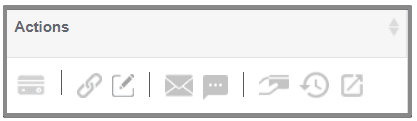
Hover over each icon to see a detailed description.
Step 2. Select the "Process Payment on behalf of the customer" option.
Process Payment
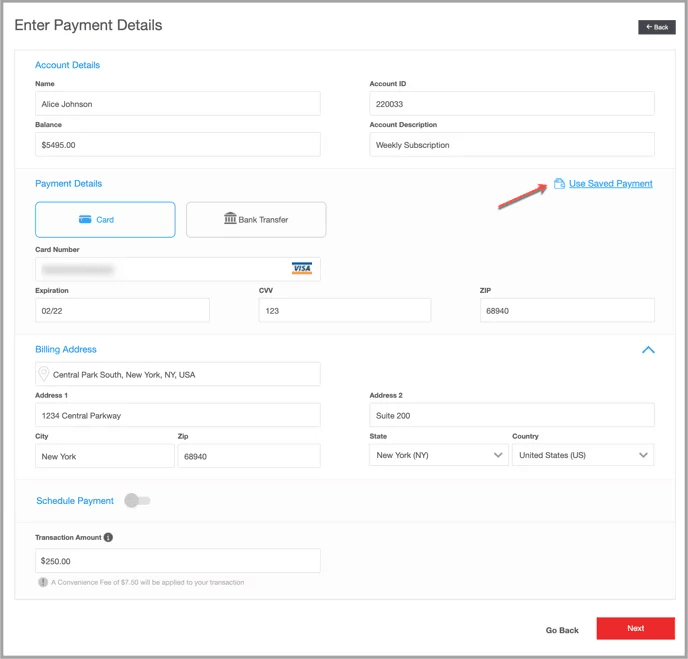
Step 1. Enter the payment amount and the customer's billing information. The billing address is optional (check your payment verification settings) and will be pre-populated with the customer's address retrieved from the lead record. The fee amount will be displayed below the transaction amount field if the convenience fee is enabled for the selected payment method.
You can use the customer billing information saved on file by clicking on the 'Use Saved Payment' to autofill the payment details based on the last payment method used. Click 'Next' to proceed, and you will be redirected to the Payment Confirmation Page.
Please note: Available payment methods may vary depending on the internal portal settings.
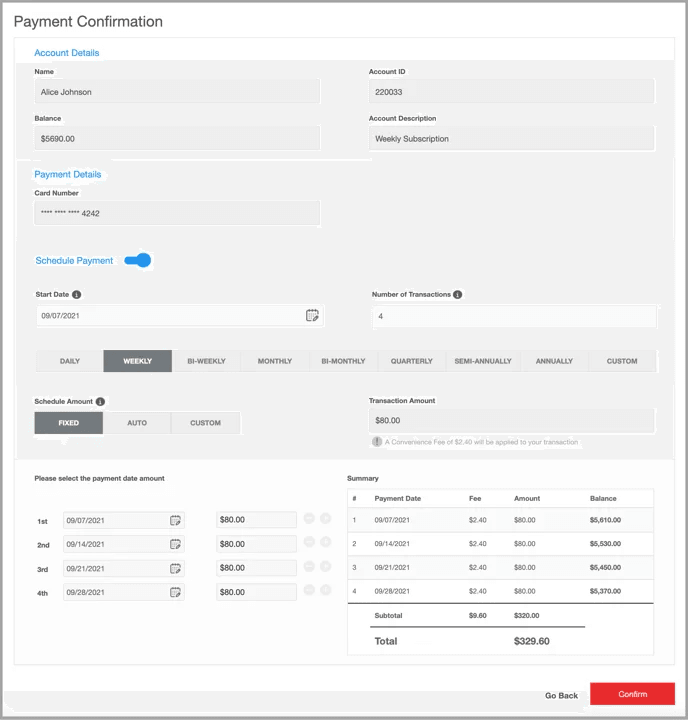
Step 2. Carefully check the payment information on the confirmation page. Click 'Go Back' if you need to modify any information, or click 'Confirm' to proceed.
Schedule Payment
Step 1. Complete the payment details and the billing address section. The billing address is optional (check your payment verification settings) and will be pre-populated with the customer's address retrieved from the lead record.
Step 2. To schedule recurring payments, toggle the 'Schedule Payment' to ON.
Please note: The start date, number of transactions, and payment method options may vary depending on the internal portal settings.
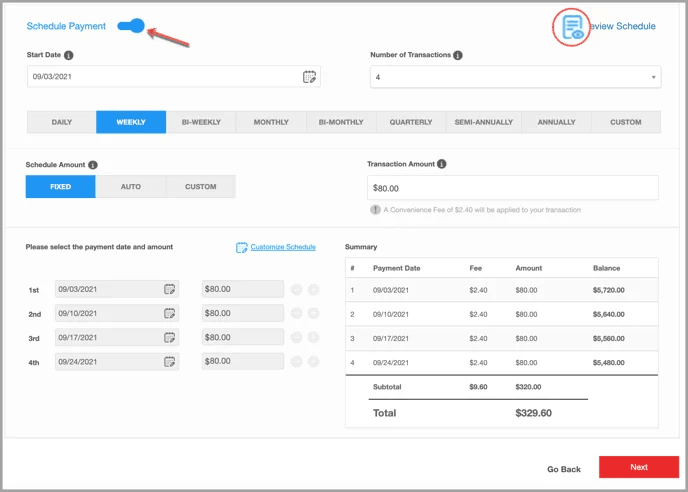
- Start Date:
Enter a start date to establish when the payment schedule begins.
- Number of Transactions:
Select the total number of transactions you want to schedule. The initial payment will be charged on the selected start date.
Please Note: The number of transactions available will depend on the transaction limit set in the internal portal settings.
- Frequency:
Select the billing frequency. If you select the Custom frequency, you can modify the payment due date for each installment.
- Schedule Amount:
Define how you want the amount per transaction to be calculated.
- Fixed: Define a fixed amount per transaction.
- Auto: This option will divide the total balance by the number of transactions.
- Custom: Define a custom amount for each transaction. You can either enter an amount or select a percentage of the total amount for each transaction.
- Transaction Amount:
Enter the amount per transaction.
- Transaction Type:
This option appears when you select 'Custom' as your Schedule Amount option. The Transaction Type gives you two options, percent and amount, to control transaction calculations.
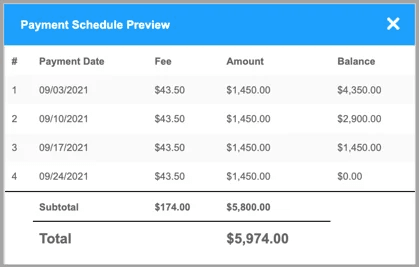
- Preview Schedule:
Use the Summary window or click on the icon to preview the payment schedule.
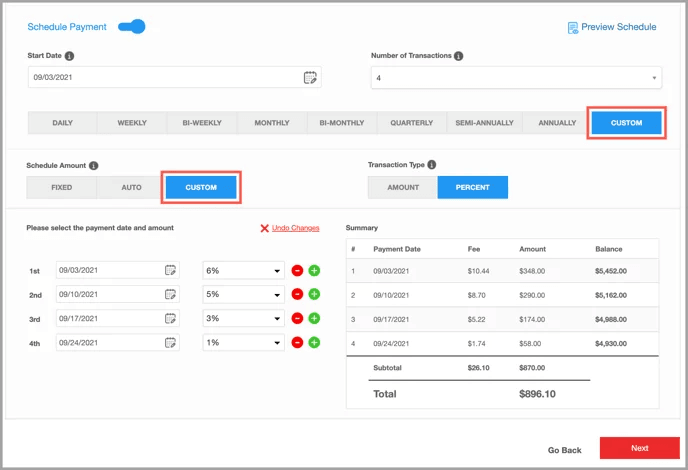
Custom Schedule
A custom payment schedule allows you to create an installment payment, where you can modify the amounts and the installment dates. Click on 'Customize Schedule' to create your own installment schedule.
Select 'Custom' as your frequency to set the custom dates for when the payments are due. Then, select the desired date by clicking on the icon. Similarly, to define the custom installment amount, select 'Custom' as your Schedule Amount option and choose the appropriate transaction type. You can add or remove additional fields by clicking on them accordingly. Click 'Next' to proceed.
Step 3. Carefully check the payment information on the confirmation page. Click 'Go Back' if you need to modify any information, or click 'Confirm' to proceed.
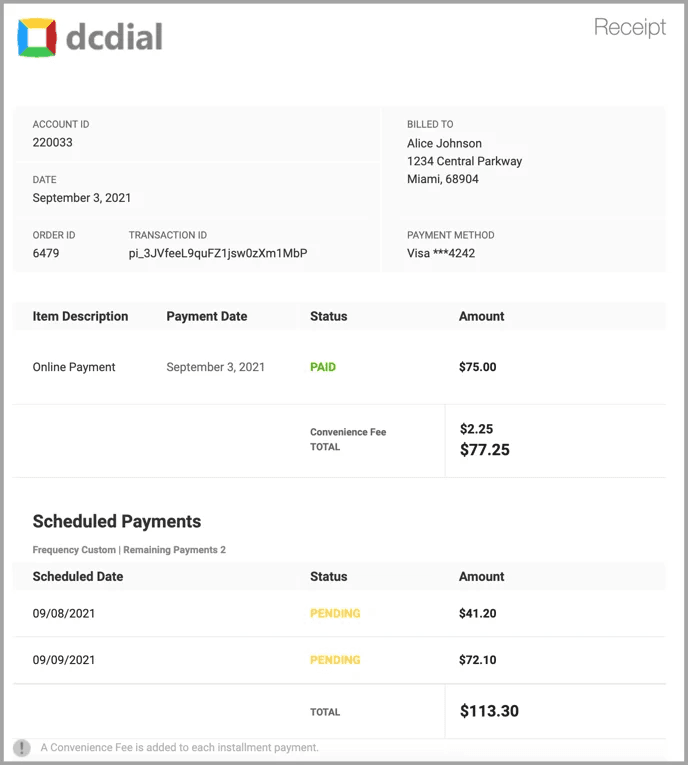
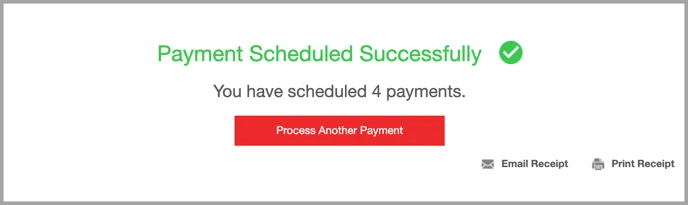
For scheduled payments, you will see the following confirmation page. From this page, you can process another payment or email/print the receipt.
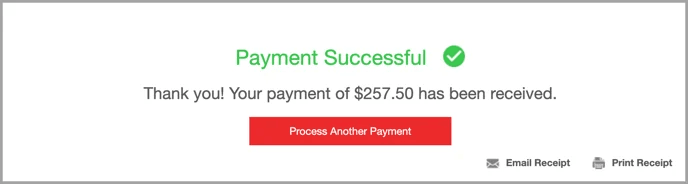
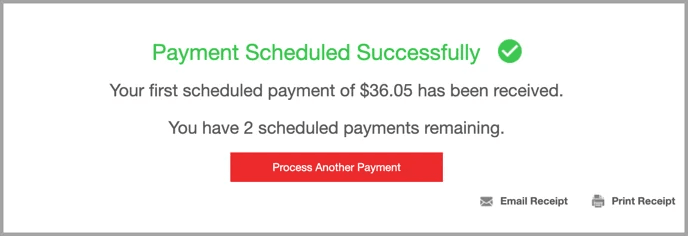
If you have selected today's date as the start date, the initial transaction will run immediately, and you will see the following confirmation page.
Once the payment has been processed successfully, your customers will receive the payment receipt via email. The status of each payment indicates the following:
- Paid: The payment was processed successfully.
- Pending: Payment is scheduled and has not yet been processed.
- Failed: The payment failed. The failed reason is typically indicated on the payment receipt. For more information, please see decline codes and reasons.